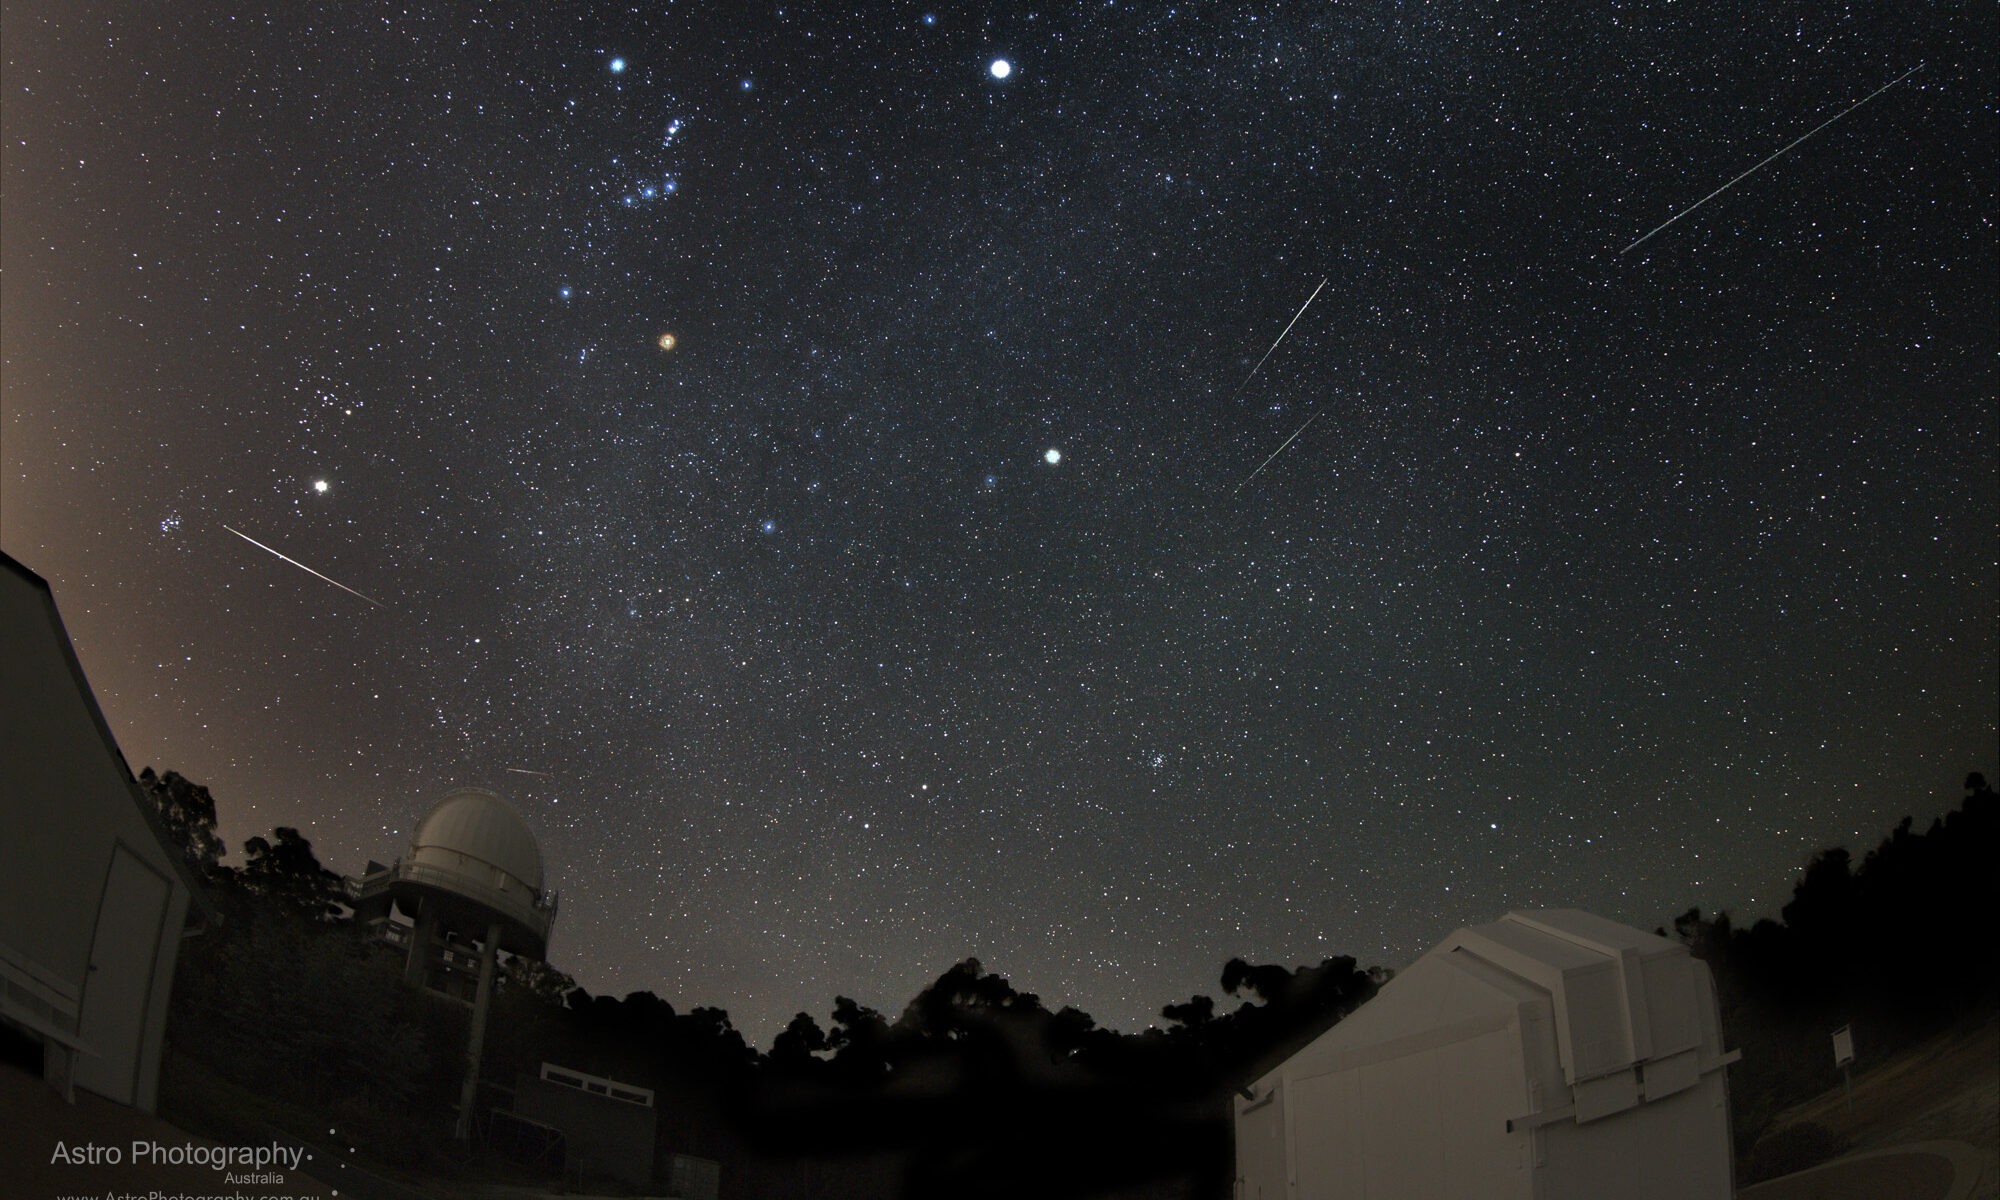
The 2023 Geminids Meteor Shower is almost upon us, with its peak overnight Thursday 14th December in to Friday 15th December (Perth, Western Australia). The Geminids is typically our most consistently performing meteor shower to observe here in WA.
This post provides some basic information on how to photograph the Geminids Meteor Shower. If you would like more info to be prepared for future metoer showers then jump on one of my workshops where I teach astrophotography.

When to Photograph the Geminids Meteor Shower in 2023
The basics of when to view or photograph the 2023 Geminids Meteor Shower from Western Australia are:
- Date: Thursday 14th December – Friday 15th December 2023.
- Time: Approximately 10pm – 4am
The reality is that Gemini the constellation, in which this meteor showers’ radiant is extending from, rises late in the evening. Parts of Gemini are above the horizon not long after sunset but the constellation as a whole does not rise nicely above the ground until about 10:30pm.
What if I can’t view them on the 14th you say? Well these meteor showers come and go over time, so you will likely see meteors on nights either side, with the rate decreasing night by night. There’s no harm in giving it a try on other nights, or even doing a practice run in the nights leading up to the peak night.
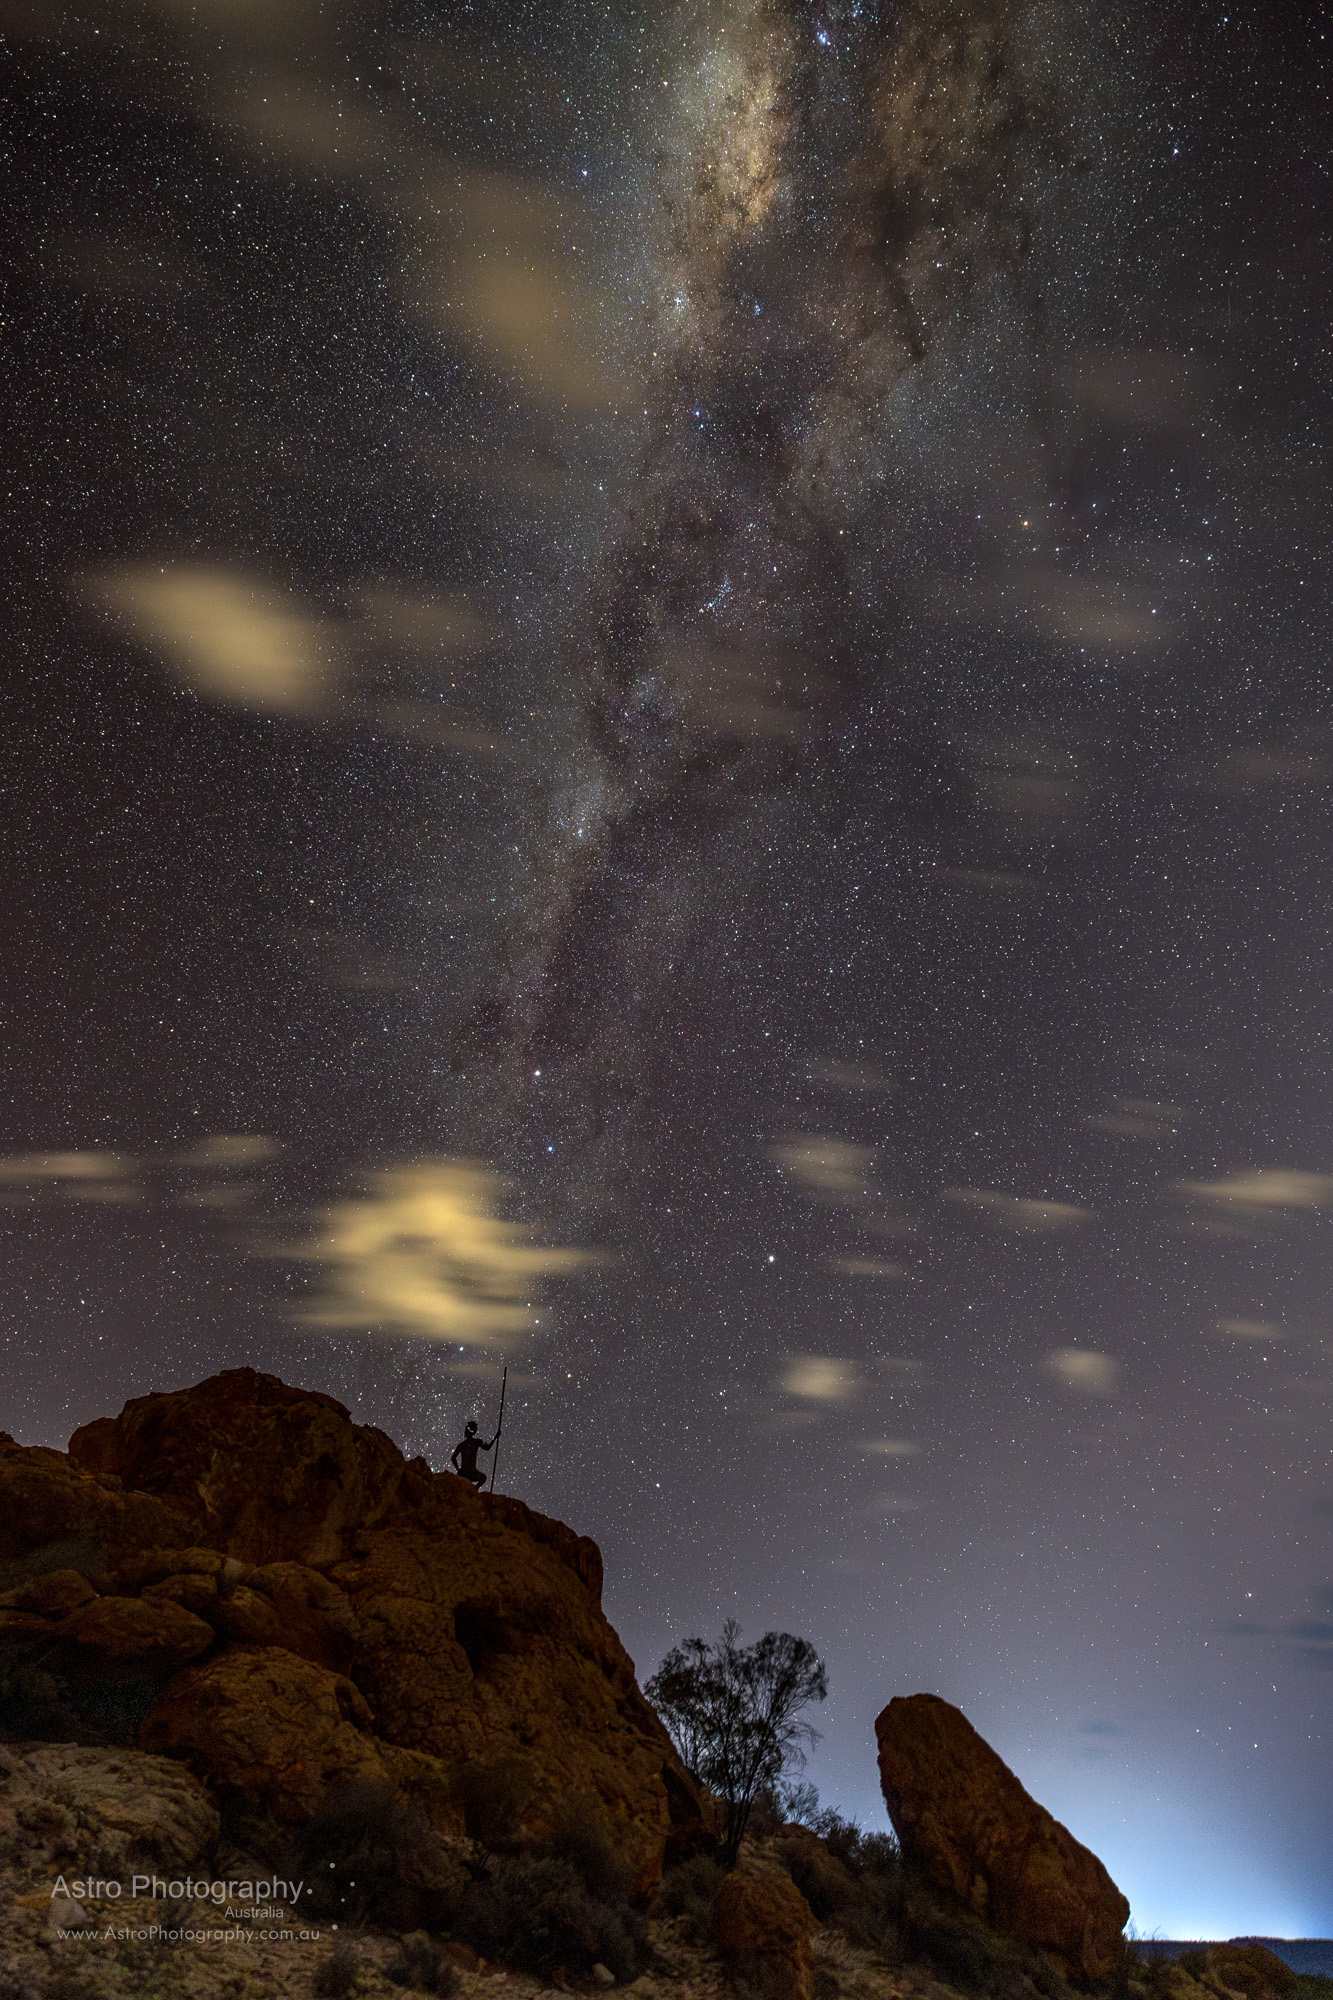
Where to Look for the Geminids Meteors
Meteors can appear anywhere in the sky but generally speaking point your camera towards the constellation of Gemini which is in the NE before midnight, North between about midnight and 2am, NW between 2am and 4am.
Until the constellation is above the ground chances are a reasonable proportion of the meteors simply won’t be above the ground either, and so your chances of seeing one is reduced until the constellation has risen higher in the sky.

Give Yourself Time
Observing a meteor shower is not something you do by simply ducking outside for 20 minutes. Even if the Zenith Hourly Rate (ZHR) is high you still need to be outside looking up (or photographing) for a decent period of time to have a chance of seeing/photographing any meteors.
- Let your eyes adjust over a minimum of 20 minutes
- Use a head torch with dimmable light to use low level white light or red light when moving around outside or using your camera, so you have more chance of seeing a meteor.
- You need to be observing the night sky for a good few hours if you are going to capture (or see) any decent number of meteors.
- If you tire of being outside, set your camera up to leave your camera taking exposures over a long period of time, many hours if you can, while you go back inside or to sleep. Cable release/intervalometers, or intermanal camera intervalometer, and possibly an external power source such as USB power brick powering the camera by USB-C can allow this.

How to Photograph a meteor shower with your Phone
Photographing a meteor shower with your mobile phone is a tough ask, I’ll be honest! You will probably only capture the brightest of meteors.
Most modern mobile phones are capable of some nightscape/Milky Way astrophotography. They do this using along exposure time, usually of about 10 seconds. Meteor showers present a particular challenge where the camera needs to capture a brief burst of light very quickly. This is difficult for mobile phones.
The algorithms used for mobile phone astrophotography typically “accumulate” the image over time and perform some smarts to smooth out noise and combine the accumulated images. This means that small brief changes like a flash in the sky might or might not, depending on your particular phone, be represented in a final image.
To give your mobile phone the best chance of recording a meteor:
- Mount the mobile phone on a tripod. Manufacturers such as Leofoto have tripod mounts for mobile phones.
- Turn off the flash
- Use a pro app to do interval shooting:
- allowing you to take a continuous sequence of photographs one after the other for a long period of time (hours ideally, but as long as you have).
- each exposure would be about 10-15 seconds ideally
- no gap between exposures
- Use a long exposure time (if able to configure this in your app) such as 10 seconds. The longest exposure time you are likely to want is 15 seconds.
- Use a external USB battery to power your phone for a longer period of time.
- Do a test run beforehand with the Timelapse function on your phone camera. If it will take long exposures during the timelapse then it may be useful, but many will limit the exposure time to very short in this mode.

How to Photograph a meteor shower with your DSLR/Mirrorless Camera
Photographing a meteor shower is similar to nightscape astrophotography with a few critical differences:
- Ensure Long Exposure Noise Reduction is disabled in your camera so it does not take a second exposure with the shutter closed (excluding Canon 6D which buffers the dark frame).
- Your camera needs to run over several hours. Use an external battery source and a large memory card, together with cable release or intervalometer to have continuous exposures.
Those are the main differences between a normal nightscape and a meteor shower session. Now I’ll go through the full set of settings I would use for a meteor shower photography using a DSLR or Mirrorless camera:
- Lens:
- Use the fastest lens you have (smallest F number, such as F/1.8 or F/2.8)
- Use a wide lens, such as 12mm, 14mm. Anything down to as narrow as 24mm is useful, but widest the better.
- Put the lens/camera in manual focus mode so it doesn’t focus hunt every exposure
- Put the lens shade on, to help keep dew/condensation off the lens
- Camera:
- ISO 1600 – 3200 is a general good starting point, depending on many factors unique to your situation, but check your images for noise and decrease ISO if too noisy.
- Shutter speed: Generally up to 15s (see notes below)
- White balance: AWB or fix it on something such as 4500k for consistency
- Long Exposure Noise Reduction: Off
- High ISO Noise Reduction: Low or off
- Drive mode: Continuous (low or high speed)
- Accessories:
- Remote trigger, cable release, intervaolometer or such to ensure continuous ongoing exposures one after the other.
- Dew heater/strap if in a moist environment prone to condensation
- USB battery pack to power your camera (if compatible)
Here’s how you go about it:
- Let your eyes adjust and get to know your camera in the dark.
- Set your tripod on a sturdy tripod.
- Configure settings.
- Focus manually on a bright star/planet using Live View. Some modern cameras will autofocus on stars in which case do this then switch to manual focus.
- Test run on short (5s) exposures to check focus and composition.
- Set to a longer exposure time such as 10 or 15 seconds.
- Use intervalometer, cable release or other mechanism to take continuous exposures.
A note on shutter speed:
- A longer shutter speed (15s, maybe 30s) will mean less images to process/store, and show a brighter night sky in each individual exposure.
- A shorter shutter speed (5s – 10s) will mean you can use the exposures to build a timelapse video with smoother transition, as well as use the exposures in their own right as individual photos. The individual exposures will not show the night sky as bright, but the decrease in shutter speed won’t affect how bright the momentary meteors are in your images.
- Your camera and lens combination, and where you are pointing your camera in the sky will dictate what the longest shutter speed is you can do before stars trail. The 500 rule is a guide (500 divided by your lens’s 35mm equivalent focal length) but doesn’t cater for all this. Do some test shots and check your playback.
Enjoy the night!
I find it hard to stop the technical work at the camera and actually enjoy the experience of being under the stars and seeing meteors in person, but we should try! As dedicated as we may be to the cause of astrophotography 🙂